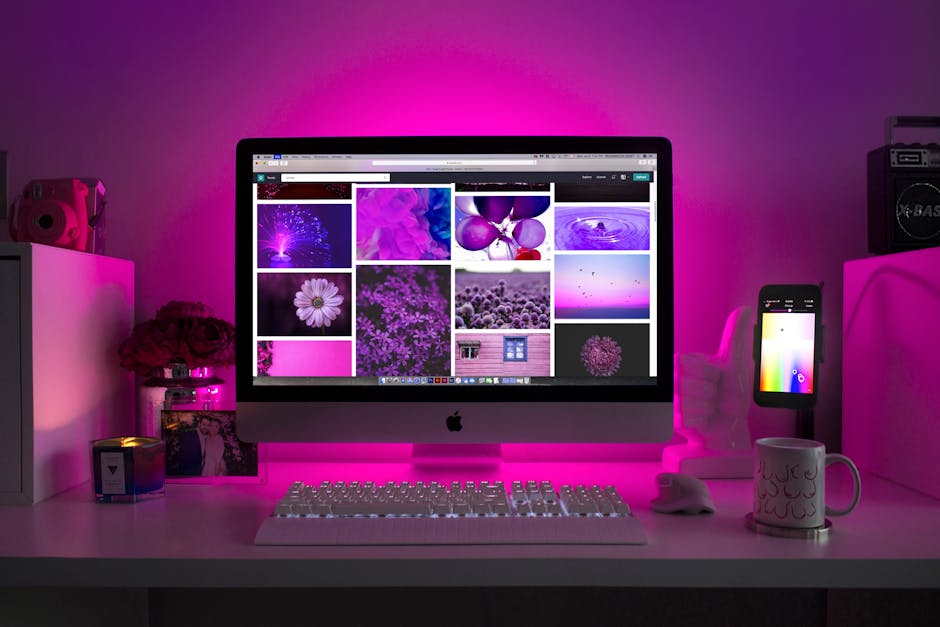
Hey everyone! This video is a timelapse of building thewebsite for my course, Responsive Design for Beginners. I’m going to walk you through the processof how I built this website. It’s not a tutorial per se, but more justshowing you my approach when I’m coding. I’m still in the process of creating thiscourse, but you can sign up for updates on its progress as well as be the first to find outwhen it launches.Link is down below in the description. All right, let’s get into it! In my workflow I generally use VS Code asmy code editor, and I’m running Gulp to compile My Sass files to CSS and run a local servervia Browsersync. On the right side I have Adobe XD which isa free program I used to design this website before building it. First off, I already have my index.html filebuilt and some Sass/SCSS files. I’m creating partial Sass files so that mystyles can get separated out which is better for organization and finding things lateron. In this setup I’m roughly dividing my Sassfiles into two categories: One is Utilities, which are variables andSass mixins that I’m going to use and reuse throughout the build. This would be for storing colors, spacing,breakpoints, things like that. Then I have a Components folder, where I’llkeep individual design patterns. For example, styles for the header, hero area,featured blocks– I separate all those out into their own files. This is part of the BEM or block-element-modifierarchitecture that I use in my Sass styles.When I build websites I like to start fromthe top with the header, and work my way down the page all the way to the footer. Right now I’m working on the header and creatingsome global button styles for those top nav links. I’m using a lot of helper classes so thatI can easily create more button elements later on with the same styles just by adding that”button” class along with the specific style. Generally when building out sections I startby adding the HTML markup first, then moving on to adding the styles. You can see here in the top nav I have everythingin an unordered list, so it is pretty bare bones until the styles get added in. For the top nav layout, I’m using flexboxto put the logo on the far left and the text links all on the right. You could also use CSS grid for this, andI’ll probably build a grid version of this nav for the final course.Once I have the basic layout and styles set,I’ll go back and polish things up, get that spacing and alignment just right so everythingmatches the design. You can see here I started tweaking the designitself to make those buttons up in the top nav a bit smaller. They just seemed kinda big. I’m using an SCSS function to convert frompixels to rems here. And I’m using it for all my font sizes andspacing as well. This is because rems in general are betterfor accessibility, allowing the user to change their browser base font size to adjust thetext size. Now that the desktop nav is set, the nextthing is building the mobile hamburger menu. One thing I do a lot when building is checkingother websites that I think follow best practices. So here I’m looking at the Bootstrap and CSSTricks sites to see how they handle their hamburger menus.I’m building the hamburger toggle by creating3 spans, one for each of those three white lines. I also am hiding the toggle on desktop soit only will show up on mobile. I’m creating some helper classes along withthat breakpoint mixin to either hide or show the toggle depending on the viewport. The next thing is building the menu that popsup when you click the toggle on mobile. For the nav links I actually am using thesame HTML markup for both mobile and desktop navs and just styling them differently. This way I don’t have to have two sets oflinks, one for mobile and one for desktop. It’s just a little more minimal that way. Styling those mobile links, so that they’rereadable and also centered. Next up we want the hamburger toggle to animateto an X when it is open. So on open I’m hiding the middle line, thenusing a transform to angle the top and bottom lines.Now adding the JavaScript to run when youclick the toggle. And some CSS keyframe animations for hidingand showing the mobile menu itself. All right, now we are on to the hero section! I’m adding the markup to the index.html file,and creating a new Sass partial, hero.scss, for the hero component. You can also see that I’m tweaking the buttonstyles to add that teal button. And adding additional styles for the hoverstate, so that the teal changes to a darker teal color. For the hover state I’m using a built-in Sassmodule, sass:color. These Sass modules come with utility functionsthat you can use. And they’re really handy for things like changingan existing color to be lighter or darker by a certain percentage. And now it’s time for the unicorn! For the unicorn image and all the other images,I export them from Adobe XD as SVGs. For the font sizes I originally was doingtraditional responsive styles with media queries. But I’m changing this here to use the CSSclamp() function.With clamp you set a min and max font size,then a viewport width size that acts kind of like a breakpoint to determine when tostart sizing up the text. And you don’t even need media queries forit. Here I’m styling the layout for the hero sothere’s text on the left and the unicorn on the right for desktop. I’m also spending some time adding globalstyles for the section headlines and descriptions, so they have consistent font-sizes, line-heightand spacing. I have a spacing.scss file which stores allthe space amounts in increasing order as variables. Starting from 10px (converted to rems) andon up.And I’m doing the same thing for font-sizes. It might seem unnecessary to do this, butI think it’s good because it forces you to use the same spacing and font sizes throughoutthe website. This ensures that the styles will be consistent. And I’m using the clamp function and my custompixels to rem function for all of these. If it seems like there’s a lot of work earlyon in this website build, you’d be right. At the beginning I spend a lot of time settingthe styles up with variables, mixins, functions and helper classes. It’s an upfront investment that will makethings faster later. Now we’re tweaking those hero styles and usingthe order property in flexbox to make the unicorn first before the hero text on mobile,and after the hero text on desktop.The next part is that angled bottom of thehero. This part is a bit tricky because the anglehas that lighter purple border, and the unicorn image is overlapping the purple backgroundand going into the next section. I tried a few approaches before I figuredout the best way forward. Right now I’m using a pseudo-element and atransform skew to try to rotate it to that angle.I’m also trying a clip path for the hero sectionto cut out that angle as well. So just trying different things here. You can see here I’m kinda struggling withtrying to add the clip-path to both the dark purple hero and the light purple pseudo-element. It did work in the end, but I kinda felt likeit was requiring a lot of code in the styles to add two clip-paths to both elements. Now I’m commenting out the clip-paths, andinstead skewing the before pseudo-element and trying to position it in the right place.And adding a light purple bottom border toit too. I feel like this approach works well for allviewport widths. The Stripe website uses this same transformskew method for their angled elements. OK, now that the hero is in a good place,we are checking on how the mobile menu interaction looks. I’m adding a keyframe animation for the fadein and fade out of the mobile menu. This utilizes the visibility and opacity propertiesto make the animation work. And I’m tieing it to helper classes that Iwill add and remove via JavaScript to run that animation when you click to open or closethe menu. Moving on to the 3-column feature blocks belowthe hero. I’m adding the markup and then exporting theSVGs for each of those teal icon images. And you can see I’m going back a bit, tryingto tweak the angled hero so that it works on large viewport widths. I’m not ashamed to admit that I did look atthe Stripe homepage to see how they coded their angled elements.And they’re using the transform skew. I’m also adjusting the space between the heroand the featured blocks on desktop and on mobile. Getting that spacing right. I’m also tweaking the mobile styles for thehero buttons. The featured blocks now get their own Sassfile, features.scss. You can see I’m using that BEM approach formy classnames with the ampersand and underscores. For this section I wanted to create both aCSS grid and a flexbox version of the 3-column layout, with their own sets of styles. There’s almost always more than one way tobuild something. And I’m trying to show this in the courseby creating alternate approaches and showing them to you.For the featured blocks we’re centering bothicon and text on mobile, and then left aligning them on desktop. Now I have both grid and flexbox versionsbuilt. And tweaking them so that the two versionslook exactly the same. Firefox has a grid and flexbox inspector,which is what I’m using to create the lines and numbers that you see.It’s a really helpful tool to help debug eitherof those layouts. Next up is that magenta fullwidth featuresection. This one isn’t as complicated since everythingis in just one column on both mobile and desktop. And it’s always centered. So we’re creating its own Sass file and alsoadjusting our spacing and font-size variables as we go through the site. We’re adding styles for the text and thatlaptop image.To center the content I used margin auto forthe left and right. I could have used flexbox or grid to centeras well, but it would require writing more than 1 line of CSS. I like sticking with the shortest solution,if I can. Now that the fullwidth feature block is done,we’re on to the alternating blocks. The idea here is to use almost the same markupfor each block, and use the styles to control what side the image and text are on. As I go through the site, I’m also creatingsome global styles. One thing I do is use a container elementto contain, for lack of a better word, the content in each section. The container has a max-width so on reallylarge screens it won’t be too wide. And I’m also adding some padding, more onthe top and bottom, and just a bit on left and right.That way all I need to do for a new sectionis add the “container” helper class, and it will automatically have all my styles. For the alternating blocks I’m using the flexboxorder property to make the image first on mobile and second on desktop. CSS grid has a similar feature, so eitherof those would work. And I’m adding in the styles for the imageand text in the blocks. Now adding in the space between items, usingthose spacing variables I created earlier. And making sure the images on mobile are ata max-width of 100% so they don’t go off the page and cause horizontal scrolling. Here we’re going back to the mobile menu,and preventing scrolling when the menu is open. We’re doing this by adding a “no scroll” classto the body via JavaScript, which turns off overflow scroll. And adding that light purple border on themobile menu. The next section is the quote block.And I’m realizing here that both the heroand quote blocks have that angled bottom (and the quote has top angle too). So after adding the markup for the quote section,I’m putting all the angled styles in a new Sass file, decorations.scss. And tieing those styles to the “angled-top”and “angled-bottom” helper classes. Then tweaking the angled styles so they lookright for both sections and on all viewport widths.Now we’re working on the quote block contentstyles. Again, we’ve made a new Sass file for allof these, called quote.scss. And adding in style rules for the layout,text and colors. We’ve saved the quotation marks as an SVGimage and are loading them as pseudo-elements of the quote content. This lets me position the SVGs in relationto the quote itself. I’m using the same image file for both beforeand after quotes, and rotating the ending quotation marks 180 degrees with a transform.Then centering the beginning quotation marksand tweaking the styles a bit for the mobile view. It took a little time to get the spacing ofthe quote content and the angled top and bottom, but eventually we got it all set and lookingpretty good for all devices. The quote content is centered on mobile nadthen left aligned on desktop. I’m also adjusting the size of that circleauthor image so that it’s smaller on mobile to match what’s in the design. Next up is the blog post section! This one is a pretty fun one, because youhave the 3-column layout like in the feature blocks up top. But each blog post is a card with a sort ofcomplex layout, with the blog post content and that little category label. I’m building out the blog styles in blog.scss. And exporting the background images from AdobeXD as JPGs. You can see here that I’m also tweaking thedesign file itself. This was to adjust the spacing in the cardsso that they match the spacing variables that I’ve been using.Now that we got the design figured out, I’mjust building one card right now to get the styles all set. Then I can copy and paste to create the othertwo cards. In this first set of blog posts I’m usingflexbox to layout the card content– the category label and the text in the white square. I’m also adjusting the teal color of thatfirst label to match the hover state of the teal button in the hero. It’s all part of trying to make the designas consistent as possible and reusing things to make the code more minimal. So the first card is pretty much set style-wise,so we’re copying and pasting to make the two other cards. And changing the card text to match what’sin the design. You might notice I’m trying to make the cardcontent different lengths in each card. This will help make sure the code can handletext if it’s longer or shorter.For this first row of blog posts cards, I’musing CSS grid to layout the cards. I’m using grid template areas, which I preferas opposed to having to set a start and end for each individual grid item. The second row of cards is using flexbox tolayout. And I’m manually adding a margin between cardsbecause flexbox gap isn’t widely supported yet. Now I’m adjusting the mobile card styles. And also looking at adding a max-width socontent isn’t suuuper wide on tablet devices. I’m doing this by creating a mixin that willadd that max-width for tablet viewports and smaller. I could also have created this with a newhelper class, but decided on a mixin so I wouldn’t have to add the new class in themarkup to all the elements that are using it.But doing so would have been a fine solutiontoo. Now I’m adding that mixin to the most of theblocks on the page, except for the hero content. And tweaking the buttons in the hero on mobileso they’re centered. Here I’m fixing a slight bug on that heroangled bottom, because on the far right the darker purple is overlapping the light purpleborder a little bit. I also am adding hover state styles for theblog post cards. So when you hover over a card it will moveup slightly and have a more defined box-shadow. And putting in a title for the blog sectionto give it more context on the page for users.I felt like cards by themselves weren’t reallyenough to tell the user that these links are blog posts. So I’m adjusting both the design file so it’sup to date, and adding the title to the page itself. Adding the title and adjusting the mobiledesign now. Making sure everything looks good on desktopand mobile widths, and tweaking that angled hero on mobile just a little more. All right, we’re getting closer to the finishline! The next section is simpler, it’s a fullwidthCTA (or call-to-action) block. I’m copying the earlier fullwidth featureblock then adding in the background gradient and the CTA content. You can see here I’m playing around with thelinear-gradient background a bit, adding in some dark gray. Now, on to the signup form section! All the other buttons on the page are anchorlinks styled to look like buttons.But since this button is part of a form I’musing the actual button element. I’m also making the form textbox more accessibleby adding a form label so that screen readers can read the name of the textbox. And using CSS to hide the label from view,so you won’t see it on the screen. Adding styles for the signup section and adjustingthe spacing for it in the design file, for both desktop and mobile. Making some other random tweaks to the footerlayout. I’m also making some design tweaks to thefooter itself. the footer actually took me quite a whileto change around until I was actually happy with it. All right, back to finish the form styles. With form elements like textboxes and buttons,there’s always a default style that your browser will use– you know the boring gray buttonand textbox with weird shadowed borders. So if you want them to look more custom youhave to override those styles for the input elements. Got the basic styles I want, and adjustingthe margin and padding, so it looks good on desktop and mobile.I’m using flexbox here to layout the textboxand button elements so they’re on the same row and align nicely. Now I’m adding in alternate versions of theform to show you how to do the layout with grid. My personal go-to tends to be flexbox, maybebecause I learned it first? But I think either one works in this situation. And just for kicks I’m experimenting withadding the form elements using neither flex nor grid, but inline-block. I did get it to work but I think flex or gridjust make really easy to put things side by side, especially if you want them to fit acertain total width on the page. Working on the footer now and adding socialmedia icons from Font Awesome to the design. I just felt like those recognizable iconshelp the links not be quite so monotonous. And you can see here I’m checking out othersites like CSS Tricks and Stripe to see how they layout their footers.It seems like the 3 or 4-column layout goingfulwidth is very common. If you follow me on Twitter you may have seenthe poll I put up with an A and B version of the footer to see what people liked better. About 80% like the 4-column fullwidth witheverything left-aligned, as opposed to a 3-column centered design. And someone on Twitter also suggested movingthe signup form into the footer itself. I really liked this idea because it wouldlet me utilize the order property in flexbox and grid to put items in a different orderon mobile and desktop. So thanks to everyone who weighed in on theTwitter poll! And now that I have the design of the footerall set, I’m coding it, again adding the HTML markup first.Then putting the footer styles in its ownSass file, footer.scss. I’ve gotta say, building a website from acomplete design file is a lot easier than trying to finalize the design as you’re buildingthe website. What’s the saying, building the airplane whileit’s in the air? Because I changed the design after havingbuilt the fullwidth signup section already, I’m now having to wrangle the code to moveeverything into the footer.And reorgnize my Sass files. It’s a bit of a pain, but honestly it happens. With this 4-column layout the form elementsdon’t have as much horizontal space as they did in the fullwidth version. So I’m shrinking down the font-size for boththe textbox and the submit button to fit things better. Now styling the actual links and headers forthe text links, and adding in the disclaimer text at the bottom. Right now I’m using CSS grid to layout thefooter links, creating a 4-column grid template, with each column of equal width. For the mobile version of the footer, I’mcentering all the text and everything is stacked to one column. Adding in that dark logo SVG and sizing itcorrectly. And adding spacing between the social links. For the social icons, I originally was loadingthe SVGs in an image tag.But in order to allow me to change their coloron hover, I made them inline SVGs in the actual HTML markup. That way I can style their hover states thesame way as the text links. And adding the the Font Awesome credit inthe disclaimer section. I’m also moving the social links into an unorderedlist, as I believe that’s best practice for lists of links. I did the same thing up in the top navigation. Now I’m tweaking the legal disclaimer sectionand adding some spacing. For the form elements, I’m putting the textboxand button side by side on mobile now too, not just desktop.And I’m removing the inline-block versionof the form, just because I feel like it’s not the optimal approach. So just sticking with flexbox and grid versionsfor this. Now I’m using grid-template-areas to layoutthe 4 columns in the footer. And putting the signup form last in the orderfor desktop. I realized that the SVGs for the logos hadempty space on the top and bottom, so I had to re-export them, and tweak the viewbox toremove the extra space.This is for both logos in the header and footer. Now just tweaking the spacing for the footerlinks. And I’m adding a flexbox version of the footer,since the initial version was using grid for layout. For the footer I think both are equally goodoptions, so it’s really up to your own preference for cases like these. All right! Let’s take a look at the finished website! I think it turned out pretty well. Again, this website is what we’ll be buildingin my upcoming course, Responsive Design for Beginners. I’m currently still making the course material–building the website was just the first step. If you’re interested in being the first toknow when the course launches, and getting more detailed updates on the progress, youcan signup to get emails, linked down below in the description. Thanks for watching, and we’ll see you nexttime!.